Sunday, November 6, 2011

More progress :-)

Here is a very brief update on what I've been doing lately, in no particular order:


  • Started working on a deferred particle renderer node, but had to cease the work after some unexpected/unexplained GLSL shader behavior: a vertex texture fetch only seems to be able to access one or two texels in one corner of the texture. I am not sure if this is because of a bug in my code, Ogre 3D, OpenGL/GLSL, or Parallels which I am using to host a virtual WinXP development environment on my MacBook Pro. Posting a question on the Ogre 3D forum did not yield any response; and I currently do not have a working Ogre 3D example that uses GLSL and vertex texture fetching. I think my next step will be to port all my GLSL shaders to HLSL or CG, and see if that makes a difference.
  • Extended the tool and framework with support for stereoscopic rendering (currently only using Direct3D since the OpenGL drivers do not seem to support multiple monitors on Win XP): 
    • Dual output, for use with Head Mounted Displays, or two beamers with polarized filters,
    • Anaglyph, for use with a single screen and red/cyan glasses,
    • Autostereoscopic, for use with 3d TV's that support horizontal, vertical or checkerboard interlaced signals.
  • Worked on a proof of concept demo for my academic advisors. Basically this entailed making sure that a simple landscape 'flyby' scene works, and that my Delft University of Technology thesis project works. 
  • Added exception handling support to the codebase, which prevents the tool from crashing without any sort of warning and/or log message. For instance, if you load a previously created visualization from file, and an error occurs during loading, an error message will be shown and the affected modules and nodes will not be loaded.
  • Switched to Ogre 1.8. Using CMake build system now allows me to generate builds for Windows or Mac, using Ogre 1.7 or 1.8, and using a variety of types and versions of compilers such as microsoft visual c++, code::blocks, eclipse, gcc, xcode and so on. I still want to switch to using XCode and Mac based development environment, but my familiarity with MSVC's debugger is what keeps me coming back to using Windows. For now.
  • Last but not least, I did some testing, testing and then some more testing. The shader editor seems to work OK now, including on-the-fly compiling and reloading of shaders. Yay :-D


Since I will be using this tool in my PhD research experiment(s), my todo list is partially dictated by what is needed to support that. But that should not amount to having to develop more than a node or two. In the mean time, I will be busy with testing the tool and framework, and working on the deferred particle renderer. I will get those @#$@# particles to work- I am not ready to give up just yet ;-)

... to be continued ...


Sunday, October 2, 2011

Reusable nodes: a primer

Less than a year ago I started a major rewrite of the program. My main motivation was to switch from using .NET to C++ as the main programming language, and from WinForms to Qt for creating the graphic user interface. Another major goal was to be able to create visual content using both node and timeline based compositing techniques. This weekend I ended up implementing one of the last major required features of this revamped framework: that of reusable nodes. The idea is that if you have created visual content in one place in the program, that you can reuse that content in other places.


The screenshot above shows a simple example. This image shows a single 3d scene drawn in 3 different ways: without any effects (left), with a 'glass' postprocessing effect (top right), and with a 'nightvision' postprocessing effect (bottom right). In the bottom left it shows how various nodes are interconnected to construct the 3d scene. The four leftmost nodes comprise the scene elements (space shuttle, hubble telescope, astronaut, and a light source), which are all connected to a scene node shown near the center of the image. This scene node connects to a render node, which draws its contents to the screen.


The screenshot above shows how each of the postprocessing nodes references the same scene node. The original scene node's content is used as input for both of the effects ('glass' and 'nightvision') that are drawn on the screen. Any changes made to e.g. the space shuttle mesh node will immediately be reflected in all renderings of the scene, since they all share the same scene node. The framework allows any type of node (e.g. a RenderTarget node) to be shared in such a way, even though it may not make much sense to be able to share each type of node (e.g. a Light node or a Mesh node).


Even though the core functionality related to sharing nodes works, including saving/loading, there still is much work to do. Mainly with regards to testing: creating scenes, adding meshes, animating meshes, then re-using these scenes multiple times during post-processing steps. I am sure that this involves a lot of program crashes and necessary bug fixes. However I am fairly confident that the meat of the code is good now, I do not expect to be making many structural changes while preparing the framework for actual use in either my research or a demoscene production :-)


Other issues that I've been working on are:
  • GUI: added syntax highlighting for compositor and overlay scripts
  • Engine: moved away from Cg in favor of Glsl. I just ran into too many related issues- not just bugs in the Cg compiler, but also limitations of running a Windows development environment in a virtual machine on a Mac.
  • Switched from using VMWare to Parallells for running Windows in a virtual environment. VMWare imposed severe limitations on the graphics hardware features made available in the virtualized environment. Basically I was not able to use any deferred rendering, until I switched to Parallells.

As usual I'll end this post with a small to-do list, in no particular order:
  • Testing, testing and more testing
  • Add support for a GNU Rocket node. However since my GUI already supports editing of keyframe animation (position/orientation/scaling of a mesh or camera), I may generalize that functionality so that you can keyframe any floating point number. I think that with relatively a few lines of code I can create the same functionality as GNU Rocket. What I end up doing depends on which of the two options is the most effective (resulting functionality vs. effort required to implement it).
  • I still dream of deferred particle renderers... now that my development environment actually supports them, I can actually start working on it :-)
  • More testing.... Will it ever end?
... to be continued ...

Wednesday, August 17, 2011

Summertime!

During the summer I did not spend as much time on this project as I intended to. Mainly because family and friends were visiting us. Another reason was that we're still not entirely settled in our new house; we often had to go out to the stores to hunt down furniture/tools, and we spent a lot of time working on house remodeling / in the garden and so on. However the little time that I managed to spend developing the tool was spent effectively. Here is a list of what I got done:


  • Platform independence: I am using CMake to manage build systems, which means that it is now possible to compile the tool for either Windows (32/64 bit) or apple osx (32/64 bit, Intel, PPC) using a variety of compilers (Visual Studio, XCode). It took me a while to learn the (quirks of the) CMake scripting language, but it was time well spent.
  • I decided to drop the use of Cg: Previously I was using NVidia's Cg language to write shaders in, most importantly because it is able to generate both Glsl and Hlsl shaders based on the same Cg code. What I did not take into account was the bugs that Cg itself contains. For instance, some Glsl shaders which I had ported to Cg, work when compiled to Hlsl but not Glsl. With other shaders it is the other way around. After looking around on the internet for possible causes, I learned of the bugs in Cg. Even though I will keep support for Cg (and DirecX) in the tool, from now on I will write all shaders in Glsl (and use the OpenGl render system)
  • Investigated other graphics rendering middleware: I briefly investigated using another graphics rendering library (Cinder) as a replacement of Ogre. I think I could reuse most of my tool's code (both the graphic user interface and the underlying engine code) and that it certainly is usable, however I decided to not pursue this any further. Although Cinder is a young and promising library, it is aimed more at 'creative coding'. Although that is in part the use that I have in mind for my tool, it is quite possible that I will have a need for my tool to do more than 'just' creative coding. Also, even though Cinder works just fine 'out of the box', as soon as you make a few changes (e.g. compile to a shared dll instead of a static library) the proverbial shit hit the fan. Although I lost little over a week on experimenting with Cinder, I decided to stick with Ogre (for now).
  • Several small functional updates / code refactors: I made some small changes in the types of nodes that are available. Instead of having several camera nodes connect to a single scene node, each scene node now exposes its own (single) camera object. You can animate (keyframe) the camera object, and by connecting an Animation-multiplexer node, you can switch between any 1 out of up to 10 connected animations for the camera object. This allows you to switch between several camera viewpoints within the same scene. As a result of this and other changes, the way that functionality is now divided over several nodes looks and feels much 'cleaner'. I think this will work out just fine!


Here is a list of things to do, in no particular order:

  • Test & fix bugs: I fixed a bug that has been present for a long time. But by accident I also discovered a new one: in the undo/redo system. Even though I have an idea about how to fix the bug that I came across, I need to test this more extensively before I add new features to the tool.
  • Deferred particle renderer: I have not done much work on this yet, even though I intended to have it finished by the end of the summer. I did spend some time looking at the math that is involved though, but I lost track of the notes that I took of it. Oh well.


Unfortunately, the academic year is also about to start. Luckily I am not taking any courses this year (at least, none for which I need to take an exam) so I may still find plenty of time to work on this project. It is now much more likely that I will end up using this tool in my PhD research, but I'll talk about that a bit more when the time comes...

... to be continued ...


Sunday, June 19, 2011

@Party 2011 results

In this post I will detail the results from two days filled with coding during @Party 2011[atparty-demoscene.net]. But first, a brief status update on recent progress. I made progress on two major todo items mentioned in the previous post: testing of general functionality (loading, saving, creating/connecting nodes and so on), and scene import. The latter however, did not quite go according to plan. To keep a long story short, I ended up using an off the shelf, free for non-commercial use, 3ds max/maya to Ogre exporter. This exporter is a) full featured, b) working, c) actively developed, d) documented, and e) supported. Rant: #$@#!#% open-source projects! The number of OSS projects that meet all the previously mentioned requirements can be counted on all fingers of a hand from which 3 or 4 fingers are amputated. Any advocate of open-source software (hereafter to be referred to as: 'delusional') who claims otherwise, basically is a hobbyist or bedroom coder who does not know what s/he is talking about. I will stop ranting here, I deliberately did not want this to turn into a rant blog. Although I may set up a dedicated blog in the (near) future, just for that ;-)

Back to business. I did some simple tests to export (animated) scenes and objects from 3ds Max to Ogre, which worked fine. Since I do not have any 3ds Max skills, I left it at that, for now. But learning the basics of 3ds Max has been high on my list of 'things to do or learn before I die'. However I've always put it off because of the intimidating graphic user interface of 3ds Max (I'll spare you another rant here ;-). So in the next few weeks/months I will spend a few hours every week to try to grasp it.

Last week I spent two evenings implementing a script editor. The script editor allows you to edit, well, scripts! It supports syntax highlighting (currently only shaders in cg, hlsl, glsl syntax), but it can easily be extended to support all types of Ogre scripts (e.g. materials). Furthermore the script editor allows you to recompile scripts on the fly, while displaying a 3d scene. I finalized this script editor during @party, and to test whether it worked I ported some Shader Toy [iquilezles.org] shaders. There still are some issues to work out, but they are indicative of bigger 'untackled problems': even though the tool can deal with script compilation errors, and as a result, just will not display any shaded geometry on screen, it is possible for Ogre to throw an exception when loading a (successfully compiled) shader. Exception handling is something I have not fully implemented yet, but which is high up on my 'todo' list.
Without further ado, here is my updated todo list:

  • Testing, testing and more testing!
  • Learn some basic 3ds Max or Maya modeling skills, so I can test scene export/import features
  • Come up with an exception handling mechanism, to catch exceptions that originate from user-initiated actions. Such as: script compiler errors, setting invalid parameter values through the graphic user interface, and so on.
  • Improve colorcurve editor: Replace the current graphic user interface, which requires you to animate individual red, green and blue curves to create a color gradient, with another interface where you can put colors at specific time points.

Note: I am giving myself a break from working on the 'nuts and bolts' of the tool, and started implementing a GPU based particle renderer :-) Between that digression, learning basic 3ds Max skills, working on and around the house, and the friends and family that are coming over to visit us during the next few weeks, I do not think that I will have much time to work on anything else. Oh well :-)

... to be continued ...

Sunday, June 5, 2011

Testing, testing, 1,2,3...

Note: this post is a followup of my previous post.

Here is a quick status update. Basically I finished implementing the following functionality:

  • Keyframe node: The graphic user interface now supports a basic keyframe editor, and keyframe nodes can be shared across different 3d objects in the same scene.
  • Postprocessing node: There now is a separate postprocessing node for applying a single postprocessing effect to a scene that is either rendered directly from a camera node, or that was rendered previously and stored in a rendertarget node ("render to texture"). The node automagically exposes shader script parameters through the graphic user interface, so you can edit and/or animate them. This postprocessing node complements the legacy render node which by default allows you to 'stack up' as many postprocessing effects as you like- but (for now) it does not allow animating the shader script parameters.

I got these features to work in a matter of days, which I am quite happy about. The tool is rapidly nearing the point where it is actually useable by someone other than myself- since you should soon be able to create animations without having to change a single line of code. Ofcourse it is also possible to code your own effects (the tool includes a C++ software development kit (SDK) with a few examples) if you like. But, before that is really feasible, I will still have to work on the following list of to-do items:

  • Testing, testing and more testing: Including, creating a basic scene by placing and connecting nodes. Add some 3d models in the scene. Render the scene to the screen. Remove some nodes, add some other nodes. Keyframe some 3d models. Keyframe the camera. Render the scene to an offscreen rendertarget. Apply several postprocessing effects to the rendertarget. Save. Load. Modify. Save again. Load again. Repeat this process until the program crashes, in which case I need to debug the code and fix the problem, or until the program does not crash, in which case I can continue with the next item on this list. I think this will take me a few days at least, if I want to do this properly.
  • Scene import: Get a Lightwave exporter plugin up and running. Extend the tool to import scenes (3d objects, materials, animations) that were exported using the plugin. In fact, I am compiling a first version of the plugin while I am writing this post ;-)
  • Improve the color-curve editor: Replace the current graphic user interface, which requires you to animate individual red, green and blue curves to create a color gradient, with another interface where you can put colors at specific time points. This is much more user friendly than the current implementation.

What happens after this remains to be seen. It depends a bit on where my interests are. I see two main directions where I could go from here:

  • Evolved virtual creatures: Based on the work of Karl Sims [youtube.com], and to a lesser extent, Archee [capped.tv] I have since long been interested in creating my own version. More specifically I want to evolve neural controllers that are able to control any skeletal structure (2, 4, 6 or more legs/wings/fins). This would require me to extend the tool with two specific nodes: a evolving neural network node, and a 3d model with support for skeletal animation node.
  • Deferred particle rendering: Fairlight's Blunderbuss [capped.tv] and later Agenda circling forth [capped.tv].

I've been sitting on the papers that served as a basis for these algorithms for years now. It's about time that I did something for fun again- tool development can be a bit boring at times, staring at the same startup screen, with the same placeholder effects, because my priority was to get the tool up & running (while obtaining 2 masters degrees and emigrating from the Netherlands to the US. Go figure ;-) Implementing these algorithms is not that much work- note that Smash (the programmer behind Blunderbuss) said on his blog that he coded the effect in one Saturday morning. However history has shown that when I get it done I will spend considerable amount of time playing with the simulation. This has happened when I added support for L-systems (similar to Outracks [vimeo.com]), which actually was the first effect evah to be added to the tool. History repeated itself when I added 4d Julia fractals, based on the work of John Hart and Keenan Crane [caltech.edu] and later IQ/Rgba [youtube.com].

I will have all the tool's functionality that was mentioned above, and either evolved virtual creatures or deferred particle rendering working by the end of the summer. Mark my words :-D

... to be continued ...

Monday, May 30, 2011

Keyframes & skins

Now that school is (finally) out for summer, I can turn at least some of my attention to my pet project. The past few days I implemented one feature from the todo list that was mentioned in my previous post. I created an Keyframe Animation node, which can hold animation data (position, scale, rotation) for 3d models, cameras, lights and so on. The graphic user interface has a very basic editor for it, as shown in the top left corner of the screenshot below:


Even though you can import Lightwave/3dsMax scenes and animations in the tool, I wanted to have a basic keyframe animation editor so that you can directly edit camera paths to be used in scenes that are not imported but constructed using the tool (e.g. containing completely code-driven effects, with generated 3d objects). There are still some minor issues to iron out though: I want to be able to connect a keyframe animation to multiple 3d objects, which is trivial to implement. However a slightly bigger issue is that if you reuse the keyframe animation in multiple 3d objects, each object will share the same position, orientation and/or scale. To mediate this, a 'time delay' node is needed, which does nothing else than ... manipulate the time (e.g. make it go twice as fast, twice as slow, or reverse). Although this should not be that much work it is an example of how this project is kind of a 'pandora's box': every time I implement one bit of functionality, I discover that other features are desirable to be able to make the best possible use of the original bit of functionality. There still is a ton of work to do before this tool is really functionally complete and stable enough to be used in a demo production. Fortunately, I still like to work on it :-)

Another feature that was implemented, more or less by accident, is 'skinning' of the graphic user interface. By loading a 'cascading style sheet', which basically is a text file that specifies things like background colors, button images and so on, you can drastically change the appearance of the graphic user interface. Just compare the screenshot above with the screenshot from the previous post- this difference is accomplished by loading a text file. Since I really dislike the Windoze look&feel, I think this is kinda neat :-)

For the record, here is a more or less prioritized and updated todo list:

  • Change ColorCurveEditor: currently animating a color sequence requires animating the r, g, b curves separately. I don't remeber why I implemented it that way (probably because it was a quick fix at a time when I was still learning Qt programming), but this is not very useful. I want to change this so you can specify keyframes as colorvalues associated with time points. I may even ditch the curve display completely, and go for a table-based approach like the Keyframe Animation editor (Keep It Simple, Stupid :-D).
  • Scene import: I am leaning towards deciding on using LightWave as a preferred modeling package. Not that I know how to model though- I think that in the past modeling software was too complicated for my taste- I just want a modeler and thats it. What I do like about LightWave is that the modeler and layouter (scene animation/renderer) are separate programs. I am leaning towards extending a LightWave export plugin to maintain tight control over it's functionality. This should provide me with a 'basic but acceptable' model/scene/animation/material exporter rather quickly, which I can improve extend over time. If I've learned one thing from many years of using open-source software, it is that 'if you want something done, you have to do it yourself'.
  • Postprocessing node: A node that allows you to apply postprocessing effects (blur, bloom etc) to a rendertarget, while controlling and/or animating the effect parameters. Currently, postprocessing is supported but the graphic user interface does not allow animation of the parameters (meaning, you have to hardcode it).
  • Animated mesh node: for loading and controlling a mesh with skeletal animation. See previous post for more details. This is more or less low priority, since the only need for it that I can think of at the moment is for making 'evolved virtual creatures' (which in turn would also require a neural controller node... there is Pandora's box again ;-)

... to be continued ...

Monday, February 21, 2011

Progress!

It has been a while since my last update, but that does not mean that I have not been coding away on my little hobby project. There has been quite a lot of progress; it just did not result in interesting screenshots showing off new features. Oh well, I guess I still will include a screenshot in this post, after a short list of what I have and have not done:

  • Implemented some basic nodes: Camera, Scene, Light, Mesh, Plane, ParticleSystem, RenderTarget
  • Render to texture: it is now possible to construct a scene and render it's output to a texture (= a rendertarget node). This texture can then be used as input to another render node.
  • Testing, testing, testing and more testing. I've been randomly placing and connecting nodes, saving and then reloading them, disconnecting them, reconnecting them and so on, to check whether the program is stable and there are no memory and/or resource leaks. This is an ongoing (slow) process though, but it's getting there :-)


The following nodes and/or functionality still have to be implemented (listed in approximate order of importance):

  • Scene import: import a 3d scene from one or more 3d tools (e.g. 3ds Max, Maya, Blender). Perhaps an intermediate format, such as dotscene, exists that each of these 3d tools can handle?
  • Animated Mesh node: This node loads a mesh and it's accompanying skeletal animation structure. Through it's parameters you can then control which animation gets shown on screen (e.g. walking, running and so on).
  • AnimationTrack node: This node can be connected to, and animate the position, orientation or scale any scene object (light/mesh/camera/particlesystem). This animation can be edited through the tool itself- which will display a list of keyframes and their associated values.
  • Neural controller node: This node evolves a neural network to control any animated mesh. This is heavily inspired by the work of Karl Sims' work on Evolved Virtual Creatures, and the more recent 4k demo from Archee called Darwinism. The main difference is that these prior works use genetic algorithms to evolve the controllers, while I intend to use artificial neural networks- more specifically, Ken Stanleys' Neuro evolution of augmenting topologies.
  • PostProcessing node: Although Ogre3d achieves postprocessing effects using a compositor framework, I am contemplating whether it would be better/easier (for the kind of virtual environments that I am targeting with this tool) to have a node that is dedicated to postprocessing. It takes a texture (from a RenderTargetNode) as input, and applies a postprocessing effect (e.g. blur, bloom, ascii and so on) to it. The effect's shader parameters are exposed through the node GUI as animable input parameters.

Unfortunately I am also getting a bit busier with my graduate study, which means that I will have less time to spend on this project. However it looks like I will have the entire summer free to work on this project, which will definitely allow me to implement everything that is listed above.

... to be continued ...

Monday, January 17, 2011

It's alive!

Although in the past few weeks I've been enjoying a holiday, they also have been quite busy. Between having a good time with my family in Louisiana/US and back in the Netherlands, I've also been working on my 3d tool. I have been cleaning up and/or connecting some loose ends: the recently developed components that I mentioned in the previous blog post, are now fully functional within the tool. Here are the mandatory screenshots:


This screenshot shows the timeline canvas widget with two modules (actually, nodes :-) arranged on the timeline. Modules are special nodes, as they appear on a timeline and allow timeline based compositing. Furthermore, the other new addition that is visible in this screenshot is that the performance profiling features that are provided by OGRE3D (the library used to draw graphics on the screen) are enabled.


This screenshot shows a few different widgets in action. First of all, double clicking on a module in the timeline brings up two other widgets: the property inspector (as shown in the first screenshot) and the node canvas widget. The node canvas widget shows an alternative representation of the selected module, and allow you to control it's input properties by adding other nodes and connecting them. In this screenshot, four input properties are controlled by curve nodes, and a fifth one is controlled by a color gradient node. Double clicking on a curve or colorcurve node again brings up two widgets: the property inspector, and a curve editor. Both curve editors are visible in the screenshot above.

I have also been working on a few other features that are not directly visible in these screenshots. They are:

  • Saving and loading compositions (nodes, modules, their properties, and their connections) in XML format, the human readability of XML assists with debugging purposes. At a later stage I may switch back to a binary format for loading and saving- however this depends on the resulting filesize(s). Since plain text compresses really well, it remains to be seen if there is an advantage to switching back to a binary format.
  • Integrating a memory leak detector (visual leak detector [codeplex.com]) which helped with finding the last remaining memory leaks. The tool is now guaranteed to be 'leak free' :-D
  • Automatic creation and utilization of a 'resource cache'. Scripts, shaders and so on are created once, and subsequently cached in a binary format. The next time that the resource is requested, the cached binary file is used instead of recompiling it.


The two screenshots show how the core features of this 3d tool are more or less in place: node ~and~ time based compositing of 3d visualizations in a visual programming environment. However since I am still ironing out some of the nuts and bolts of the tool and framework. Currently there mostly are dummy nodes & modules implemented. Although they do draw something on the screen, they are nowhere near useful enough to create e.g. a demo production. Before I (or anyone else who is interested ;-) can start with implementing more useful nodes, there are a few things left to implement and/or figure out.


  • What are the 'bare minimum' of node types that are needed ? Here is a list representing my current thoughts. Most of these node types can be used 'as is'. At least some of these nodes can be subclassed for creating custom content.

    • Scene: This node holds a 3d scene. For instance, when importing a scene from your favorite 3D design program (LightWave, 3DS, Blender), it will be represented by a Scene node. Additional content can be provided by connecting 'scenecontent' nodes.
    • SceneContent: can be subclassed to provide content to be inserted in a scene. For instance, the SceneContent node can be subclassed to add a mesh to the scene and adjust or animate its properties (position, scale, rotation). Another subclass could provide a particle system. And yet another subclass could provide generative content.
    • Camera: Represents a camera and all its properties, and possibly a camera path. It could be possible to connect this camera to different scenes.
    • Viewport: Represents a viewport and its properties (such as dimensions). A camera can have several viewports, but a viewport is connected to a single camera.
    • Render: Draws the contents of a viewport either to the screen or an offscreen rendertarget. This node can be subclassed to implement forward and deferred renderers.
    • Texture: Represents a texture. Provides input pins such as (u,v) and output pins such as (rgba, r, g, b, a)
    • RenderTarget: Represents a texture that can be used to render a viewport to.
    • Curve: Represents an animated number value. Already implemented.
    • ColorCurve: Represents an animated color value. Already implemented. However since the current implementation requires you to key the r,g,b,a values independently I may rewrite this so that you can keyframe colors instead.

  • Some widgets are also required:

    • Camera path editor: this can be done 'quick and dirty' by just showing an editable list of coordinates. Camera paths can be imported from your favorite 3D editor (Lightwave, 3DS, ...) and saved/loaded from the tool.
    • Script editor: I want to include at least a basic text editor to edit scripts for shaders, material and so on.
    • Information: displays information about the item that is currently under the mouse cursor.
    • Shader editor: Eventually I want to include a node-based shader compositor. Even though this is not that much work, it is quite low priority. First I want to get all features listed above to work.

  • And finally, to complete my transition from Windows to OSX, I want to switch tool development over to XCode. In theory the framework supports it (no Windows specific components are used anymore), but in practice I must learn a new development environment from scratch- with a project configuration that is a bit beyond the 'hello world' examples found on the internet. I will spend some time each week on making this happen, because after about two decades of using Windows and developing software for it I am extremely tired of it. Even when I am called a fanboy, but that is just because I dont really care what others think of me ;-)


There has been plenty of progress, but there also is quite a lot to do! Fortunately all of the above features 'only' require a few hours of implementation each. Meaning, I do not need to make huge changes in the underlying framework code (I think... ;-). So in the coming period I will spend a few hours each week working on one feature, until all of them are done. I plan on having all of them done by the summer of 2011.

... to be continued ...

Sunday, January 2, 2011

Happy new year!

After a few weeks of inactivity, here is yet another report of some progress. This is the first of (at least) two major increments in functionality. Have a look a the image below, which summarizes the new features that have been integrated in the editor.


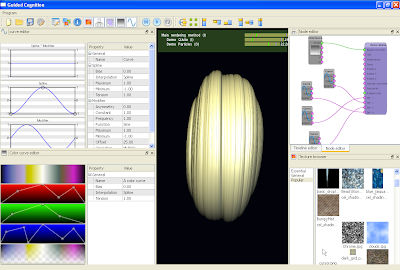
This image shows the following working features:

  • Timeline editor (top left): this window allows time-based compositing, which is accomplished by inserting and arranging modules on a timeline. These modules draw some 3d content on the screen. This window supports zoom/pan/undo/redo. All module code is plugin-based, so new effects can be added by copying a dll file and restarting the editor.
  • Color curve editor (top right): this window allows editing of color gradients that can be used in the animation.
  • Curve editor (bottom right): this window allows editing of curves that can be used in the animation. A spline (shown in the center graph) and a modifier (shown in the bottom graph) are combined into a final curve (shown in the top graph). By specifying parameters the behavior of both the spline and modifier can be influenced. For instance in this image the modifier is a random value; however it could also be a constant value, sawtooth, inverse sawtooth and so on.


This image shows the following incomplete features:

  • Node editor (bottom left): this window allows node-based compositing, which is accomplished by inserting nodes and making connections between them. This window supports zoom/pan/undo/redo. Example nodes are for instance: a 3d scene (imported from 3ds max, Maya, Blender), a postprocessing effect such as blur, a render node (either forward or deferred) and so on. Render nodes are also modules - this makes a mixture between timeline- and node-based compositing possible.


The editor now has a more or less working skeleton for all the features that it needs in order to be able to orchestrate visualizations. However one major step remains, which is the big one. Up until now the engine only supported timeline-based compositing, with all functionality encapsulated in modules. In the next week(s) this will be updated so that node-based compositing is also supported. This will be a major update; but when it is done the editor can (finally) be used again to make some real, actual productions with!

Happy new year!